SHEFFIELD GARAGE PRESENTS...![]()
REPLACING BUMPER FILLERS
ON YOUR BIG ELDORADO
![]()
Our subject vehicle is a 1977 Cadillac Eldorado Biarritz coupe. This particular car is a very clean, low mileage car, with only 45,000 miles on it. I recently purchased that car, and although it was garage kept since new, the material that the bumper fillers are made out of basically disintegrates after a while. Some theorize that it is exposure to moisture, or sunlight, or hot temps, or cold temps, but in reality, GM was using some brand new materials in the 1970's. These fender extensions needed to be flexible, and needed to be able to move in and out to accommodate the newly introduced Federal standards for 5 mph impacts. The OEM fillers were made out of a material that can be described as more of a rubbery compound, than a hard plastic. Special flex agents were needed and were mixed with the paints when they needed to be replaced when the cars were fairly new.
GM no longer manufactures these parts, but a thriving aftermarket exists, as the cars of the 1970's become more and more collectible, and are being restored in greater numbers. If you do find OEM fillers, either as mint used examples from a well preserved car, or as NOS (New Old Stock) parts, I don't know how long they would hold up if you had them painted and installed them on your car. Everyone that has one of these cars will run into this situation at some point, so I decided to document the process of replacing these troublesome parts. I currently own three cars that have these parts, and they are a 1976 Eldorado convertible, a 1977 Eldorado Biarritz coupe, and a 1985 Eldorado convertible. The car pictured, is the 1977 Biarritz, which as you can see, needs this done.
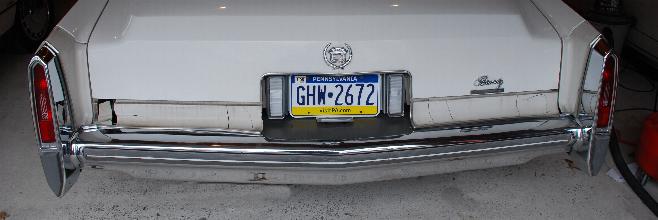
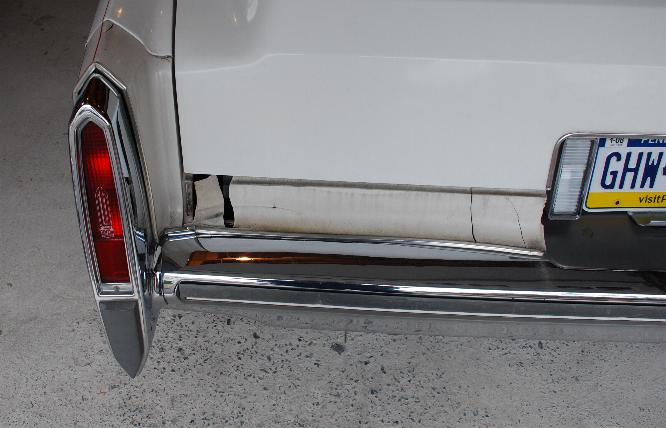
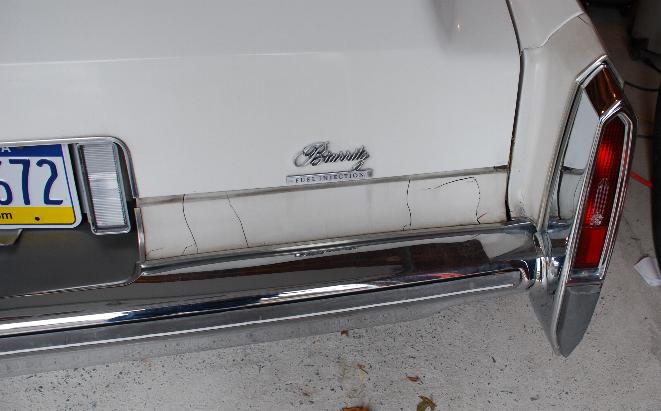
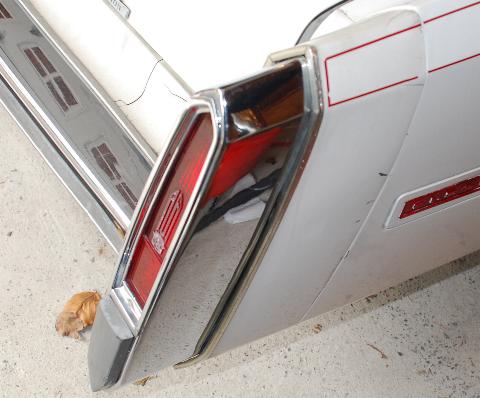
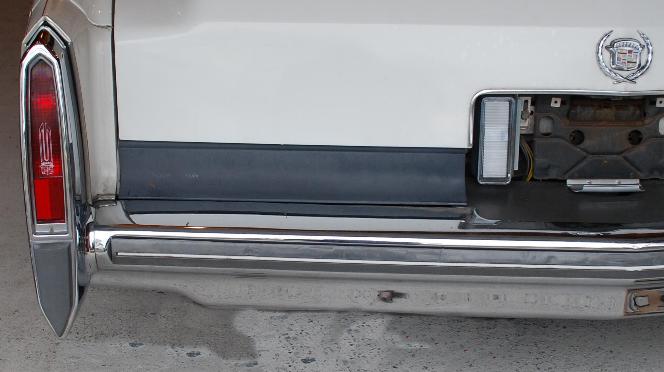
As you can see, there are cracks on the quarter panel extensions and the tail light panel fillers, and they need to be removed, and replaced with new ones. But which company do you buy from? Do you look on eBay? Do you search the web? Do you look at ads in the Cadillac Club publications? Do you go to Hemmings Motor News? The answer is all of the above. I purchased several sets for different cars over the years, and in my opinion, they all come from the same source, but there are a lot of resellers. This set came from a trusted scource of Cadillac parts, David Sabonjian. His website is: www.antiquecadillacparts.net/cadillac-abs-bumper-fillers/
David has many years of experience with Cadillac parts and will be able to provide the best quality at the best prices. The phone number is 201-960-6612. Mention the "Sheffield Garage Website" if you contact him.
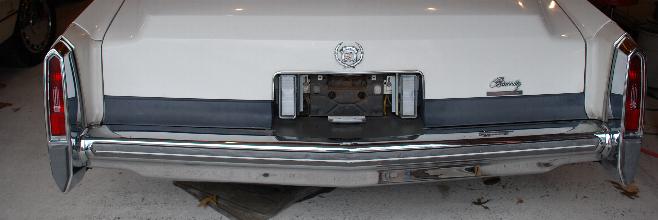
The problem is, these parts are molded in ABS plastic, but none of them are an absolute exact fit. There is always a little bit of tweaking involved, sometimes minor, sometimes major. The plus side to using the ABS fillers is that they do not require any special flex agent to be added to the paint, and they are easy to work with if you need to do some minor trimming, or elongate some of the mounting holes to get a more precise fit. This car is a relatively easy car to fit the rear set of fillers to because of the taillight design. My 1976 has horizontal taillights, and the fillers go around them, so you need to make the outside edges line up on all four sides, and the inside cutout for the tail light. On the 77 and 78 Eldorados, the tail lights are in the bumper ends, and these filler panels are a single piece, with no tail light cutout to have to fit. Here is a photo of the 76:
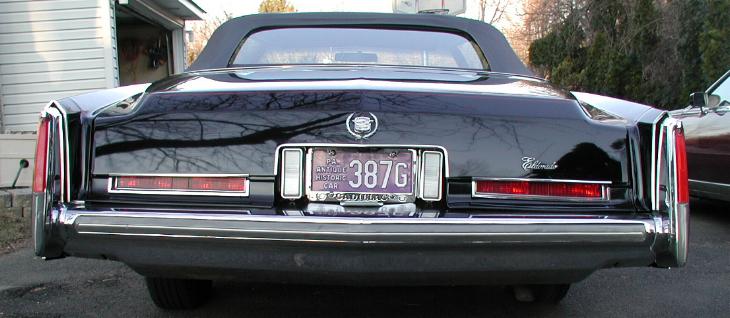
As you can see, these were much harder to fit, in fact I am really not thrilled with the fit, but the ones this car came with were totally crumbled, and I needed to get a set on there right away.
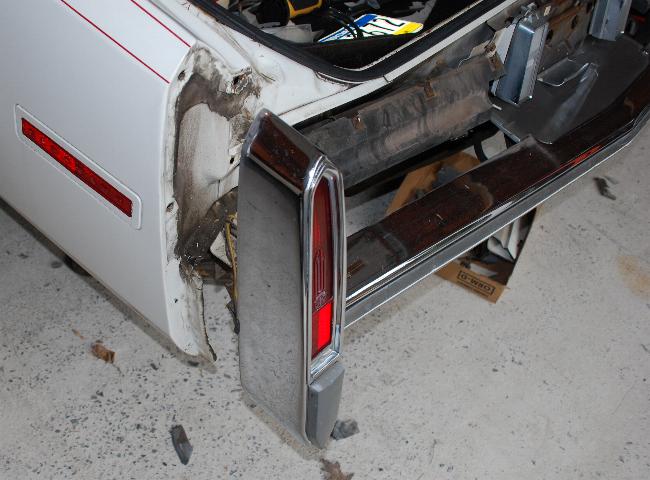
You begin by opening up the trunk, and removing the tail light panel fillers, which is a very easy process. There are 5 screws, easily visible on each one. Note that the original filler is tucked under the metal lip at the trunk opening, and also tucked behind the backup light housing. This will become important later. The MOST important thing here, and especially on this car, is to accomplish this without breaking the plastic chrome beading that is on the edges of the fillers. This particular part was badly cracked, and was removed in sections, which is a common thing. by working carefully, you can avoid damaging the plastic chrome beading, and try to reuse it on the reproduction fillers. If you find NOS moldings or mint used ones, they tend to be very expensive, so if yours are intact, do your best to get everything apart without breaking them. They look like chrome, but they are plastic, and will be very brittle. New fillers are shipped with a short roll of universal chrome beading, which is common door edge molding that you can get at any auto parts store. We will see what happens when we get to that point. I will be trying to reuse the original molding. This car was purchased recently from the original owner, and it's a garage kept beauty, with only 45,000 miles on it since new.
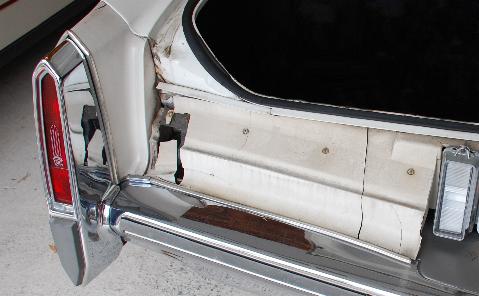
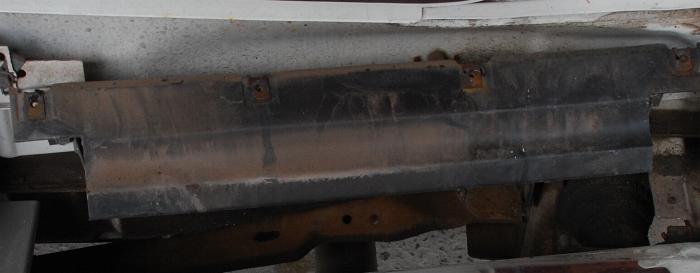
Below, you will see the filler completely removed, exposing the bracket underneath. The bracket has captured nuts, clipped to elongated holes in the metal brace. These nuts can be adjusted from side to side to match the holes in the new fillers.
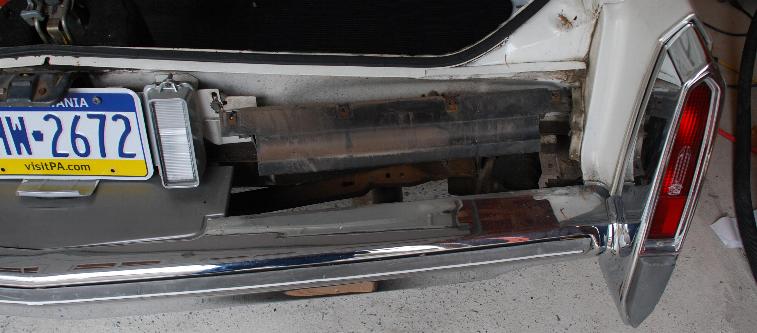
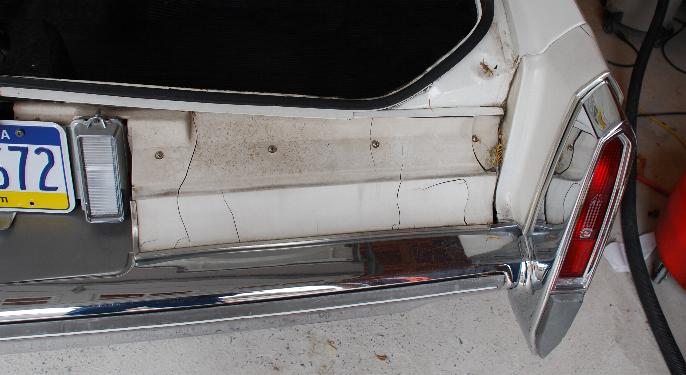
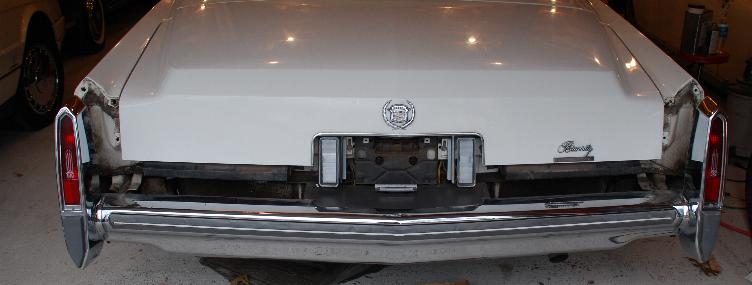
Below you will see the new reproduction filler set in place, and secured by only 2 screws. You will also see that this filler does not fit under the metal lip at the trunk opening like the stock ones do. If you try to force it under the lip, the lower edge will not line up with the bumper properly. The other problem here is that the screw hole in the extension piece on the left side, to the left of the backup light does not line up with anything. Your choices are make an additional hole in the filler, or to snip this end off since it basically serves no purpose, and is hidden when the trunk lid is down.
What you have to do here is pick your battles, get the filler to line up for the best fit against the bumper, and against the quarter panel extensions, as these are your most visible lines. I opted to snip those ends off on the 76 Eldorado rear, but I may just leave these on for now on this car.
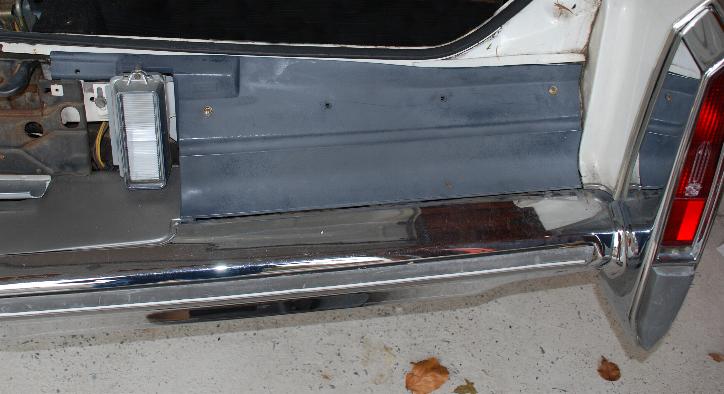

I always like to pre-fit these kind of parts prior to sending them out for paint, and I am very satisfied so far with the fit of these fillers. They line up, the gap under the trunk is good, they are laying straight and flat on the top of the bumper, and line up well with the license plate/gas filler filler that was recently replaced by the car's former owner. .
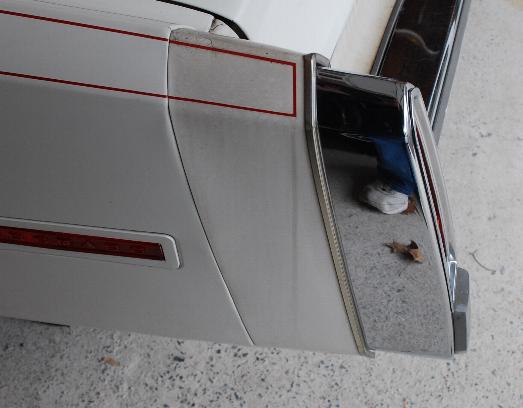
If you look carefully at the photo above, you will see there are plastic chrome moldings on the quarter panel extension fillers too. These are almost impossible to remove in 1 piece because they are already split in 3 places to make the angled bends at the peak at the top. I did end up splitting both of them, but careful reassembly, and a drop of Super Glue should solve that problem. Where would we be without Super Glue, Velcro, and wire ties?
Time to move on the the quarter panel extensions...
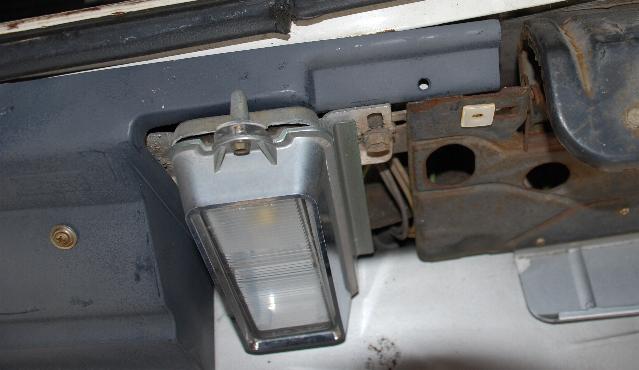
The quarter panel extensions are held in place by a two piece rigid mounting bracket that fits inside of the filler. The filler is sandwiched in between the quarter panel, and the bracket, which has studs that go into the trunk opening. There are also 2 bolts with a 1/4 in head lower down on the outside edge, accessed from under the car. A 1/4 inch deep socket and short extension is needed to remove the speed nuts inside of the trunk. These are easily accessed by moving the cardboard trunk liner aside and looking inside.
I did a test fit of these parts as well. It's hard to tell how they will exactly line up, because the risk of putting the chrome beading on to do a test fit just isn't worth taking. I already know that I need to tweak these parts and have removed the inside corners where they were hitting against the inside of the body. Not a big deal, this area is completely hidden when the job is done.
The repro parts have extra material globbed on the inside of the peak, presumably to add strength. It will be necessary to grind a bit of the metal braces in order to get the studs to line up with the holes. Here is an interesting tip. Take the opposite side braces, and lay them on the outside of the new part (normally they go on the inside, so flipping them allows you to see if your holes are properly drilled). I checked mine, and they look good, so my next step is to grind the brackets a little bit, get them to fit inside of the fillers properly, and then send them out for paint.
I will be adding more photos and text to this page, when i make these modifications to the brackets, and of course when the painted parts return and are ready to be installed.
Regarding paint, all you need to do is find the paint code for your car, either on a decal on the inside of the trunklid, or on a metal plate on the top of the cowl, under the hood. The paint code, along with the year, make and model will enable a body shop to acquire or mix the paint to be used on your fillers. The code on your car is the designation given by GM, not a mixing formula. I recently got a 5 piece set done for a 1976 Seville, they looked great, and the cost was $250.00.
Source of parts:
David Sabonjian Vintage Cadillac Parts
201-960-6612
www.antiquecadillacparts.net/cadillac-abs-bumper-fillers
![]()
Brian Rachlin, rachlin@comcast.net
Back To Sheffield Garage Homepage
Please note: I am not a professional mechanic. I am not specifically endorsing any particular vendor, there are many sources for these parts. I am merely trying to document the process of getting this problem area on many cars straightened out, and help my fellow Cadillac collectors if possible. Always use caution when working on your car, and always observe sensible safety practices.